

Are you looking forward to migrating your site from Squarespace to the world’s biggest CMS – WordPress? There is no doubt in how excellent website builder Squarespace is to kick start your website project without a need to learn HTML, CSS, or coding. While Squarespace is a good option for the amateurs to build their website, it is observed that the users often transfer their site to WordPress after recognizing the limitations of the platform.
You may wonder why you need to use WordPress? Is your old site not good enough to work upon? Do you need to switch upon WordPress from another platform? WordPress is one of the most flexible website builders in present times as it is way easier to customize the site appearance, and you can also expand the functionalities for the non-tech-savvy users. WordPress comes with loads of alluring themes and plugins to help you get an amazing website appearance.
In this article, we will be taking a look at how to migrate from Squarespace to WordPress in just a few easy steps. Let us get started.
Beginning with WordPress
When you make use of Squarespace, it is obvious that you are hosting your website on one of its servers. The subscription fees for Squarespace covers all the hosting charges along with the site-building and other extra expenses. Contrary to this, the core WordPress software is free to download and use. But still, you will have to purchase the web hosting to install WordPress on your web hosting account. There are different types of website hosting – dedicated server, VPS hosting, blog hosting, cheap hosting, and many more.
It is highly recommended to use WordPress for website hosting. Running a WordPress website on WordPress.org will cost you less than what you used to spend on Squarespace. During and after the domain transfer, you will access your Squarespace website as it will begin to use the built-in Squarespace subdomain.
Install WordPress
After signing up with the new web host, it’s time to install WordPress. One of the main advantages of using WordPress for hosting your site is that it comes with one-click installers. This lets you create your hosting account on WordPress without signing up for any tedious process. After subscribing to the particular hosting plan, you can select the theme of your choice. Make sure to have a unique theme as it can be defined as the identification of your website and helps to make your site even more popular.

[Image Source]
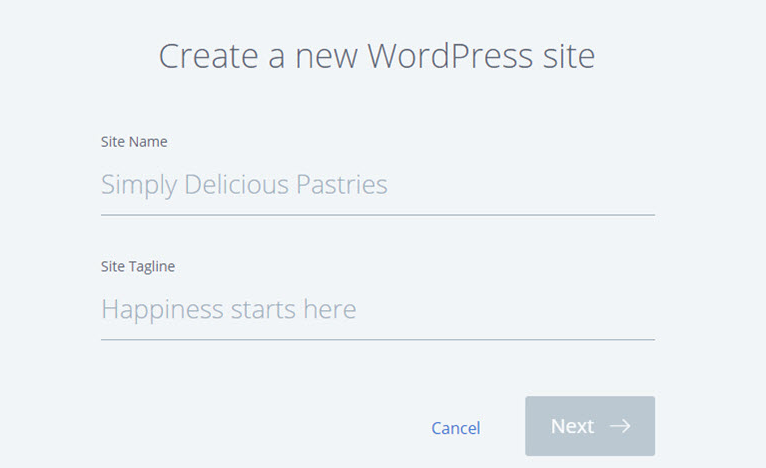
Then, you will be asked to enter the name and tagline for your site.
[Image Source]
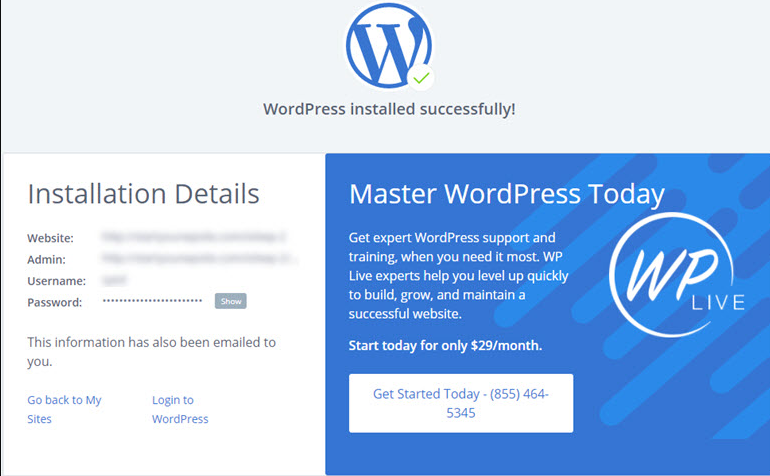
After entering the details, it will automatically install WordPress for you without consuming much time. Now, you can log into your website using wp-admin to your URL. – http://example.com/wp-admin
[Image Source]
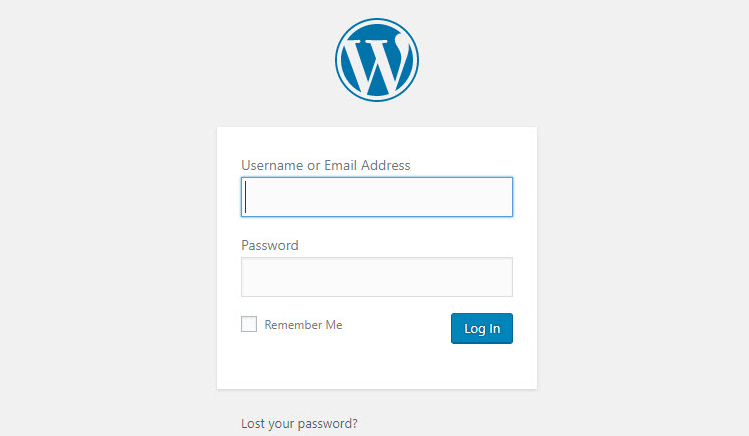
Enter the credentials sent to your personal email address and voila! You are ready to get started with it.
 [Image Source]
Export Squarespace content using Built-in tool
After setting up the web hosting account, it’s time to export all of your content – basic pages, main blog page, gallery pages, recent blogs, embed blocks, text, and image to WordPress. All the other content needs to get transferred manually. Log into your Squarespace account and select the Settings -> Advanced -> Import/Export option.

[Image Source]
Select the Export button, and you will be presented with a modal popup where you can select the content you wish to export. When the files are exported, you will have to download them all. Ensure that all the files are safely stored in the folder so as to avoid any loss of content.

[Image Source]
Importing Content and Images
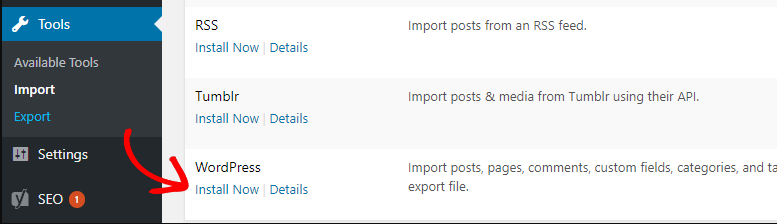
Next comes importing the content which you have downloaded into your WordPress site. Select the Tools option from the WordPress dashboard and click on Import.
 [Image Source]
Click the Install Now and select the Run Importer to import all the files into the site. Though there is an option to import the attachment images that do not work during the migration process.
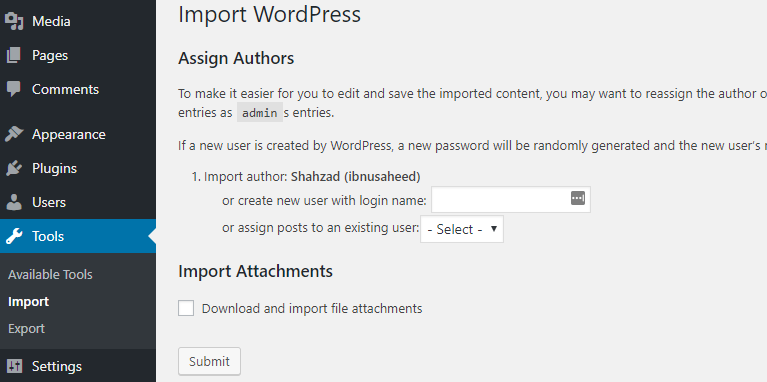 [Image Source]
Squarespace does not allow exporting the images by default using the built-in tool. Hence, you have to manually import the files into your WordPress website. Luckily, there are a bunch of WordPress plugins in the repository that easily import the external images into your site. To import your image files into the newly installed WordPress website, you need to install and activate the Import External Images plugin.

[Image Source]
Fix all the Permalinks
It is important for you to keep your permalinks in a proper way in order to not lose the traffic which is coming from the links of your Squarespace website. The good news is that WordPress is so flexible that it can set the permalinks structure as per your desired way. To set up your WordPress permalinks, click on Settings -> Permalinks, where you can select the custom software options and insert the structure as given.
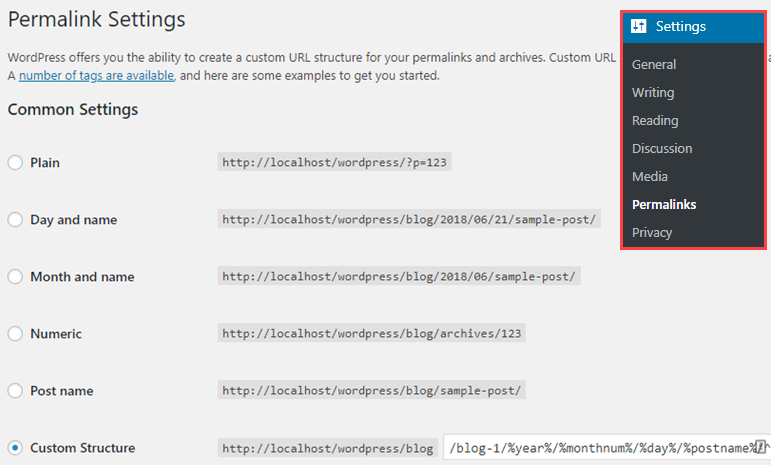 [Image Source]
Save all the changes to set up your new permalink structure for your blog posts. This way, you can keep your permalinks intact without losing the search engine and referral traffic on your current posts. There are a few chances where you can encounter 404 errors on your WordPress website after migration, but you can redirect them.
Import the content from Squarespace to WordPress manually
As Squarespace comes with limited export functionality, you will have to import some content manually such as event pages, eCommerce, audio-video files and much more to your WordPress website. This seems to be tedious when you depend on how much content has been hosted on your Squarespace platform.
If you wish to integrate an E-commerce storefront in Squarespace then you can make use of the WordPress ecommerce plugin such as WooCommerce. To host video files, it is recommended to utilize third-party hosting services such as Vimeo or YouTube rather than self-hosting them.
Sum up
Now that you have migrated your site from Squarespace to WordPress, it’s high time to follow some of the simple practices to ensure the security and performance of your site. You will need to build a contact form, add the Google analytics for tracking the traffic, install WordPress security plugins, work on SEO, backup your WordPress, and prevent spam comments on an immediate basis. Website security is equally crucial for any website to protect the customer’s private data. We hope this short guide has helped you to understand the easy migration steps from Squarespace to WordPress. Follow these simple steps, and you will be able to migrate your site in no time without any hassle. Do let us know in what other ways can you migrate your website from one platform to the other one in the comment section. Till then – keep learning!


I believe that is among the so much significant information for me.
And i’m glad studying your article. However should remark on some basic issues, The web site
taste is great, the articles is actually great : D.
Good task, cheers
Wow that was strange. I just wrote an extremely long comment but after I clicked submit my comment
didn’t show up. Grrrr… well I’m not writing all that over again.
Anyhow, just wanted to say excellent blog!