


Have you ever encountered a blurry image when trying to enlarge it? This is a common issue with raster images. Today, we’ll understand, how to vectorize an image. This will unlock a world of crystal-clear, infinitely scalable graphics.
How To Vectorize An Image Using Super Vectorizer Pro
What is Image Vectorization?
Image Vectorization, also known as raster-to-vector conversion, is a process that transforms a raster image into a vector graphic. Now, how are raster and vectors different? Vector graphics use formulas to represent lines, shapes, and colors, unlike raster images, which store information as a grid of colored pixels.
Because vector graphics rely on formulas, they can be scaled to any size without losing quality. In simple words, Vectorization makes a blurry, pixel-based image into an infinitely scalable image.
What To Keep In Mind While Vectorizing An Image?
Image Complexity:
Vectorization works best with simple images with clear lines and distinct colors. Complex images with gradients, shadows and fine details might not convert well and may require some manual editing.
Image Quality:
Starting with a high-resolution image will give you the best results. A low-quality image will result in a blurry and low-quality vector graphic.
Color Reduction:
Vectorization often reduces the number of colors in the image.
Software Capabilities:
Every vectorization software offers various features and settings. Choosing the right program is important to achieve the desired level of detail.
Now that you know what image vectorization is, it’s time to explore the tool that will make this process a breeze. Choosing the right vectorization software can significantly impact your results.
Consider factors like image complexity (detailed images might need advanced software), desired features (segmentation for cleaner outputs), ease of use for your comfort level, and file compatibility with your design software. Batch processing for high-volume tasks is a bonus!
With these in mind, let’s see how to vectorize an image using Super Vectorizer Pro.
Super Vectorizer Pro – Image Vectorizer For Mac
Super Vectorizer Pro is the ultimate solution for all your vector needs. This vectorization software for Mac converts raster images (like JPEGs and PNGs) into scalable vector graphics.
The Super Vectorizer Pro offers unique features that make this tool special:
Image Segmentation: Achieve cleaner and more concise vector graphics by separating distinct image elements.
Line-Tracing Optimization: Benefit from a new line-tracing engine that delivers results tailored to your needs.
Image Skeletonization: Convert pencil drawings into clean vector graphics with ease.
Enhanced Pre-processing: Simplify complex images with the built-in smoothing function.
Multiple Color Support: Convert images with up to 64 colors.
Using this vectorization software, you can convert your images into vector graphics in 3 simple steps:
- Upload your image
- Choose your color mode
- Download the vector graphic
Let’s look at how to use Super Vectorizer Pro to vectorize your raster images –
Mode 1
Mode 1 is the default mode in Super Vectorizer Pro. Let’s look at how to use this mode to vectorize your images:
1. Upload the image you want to convert into a vector graphic.
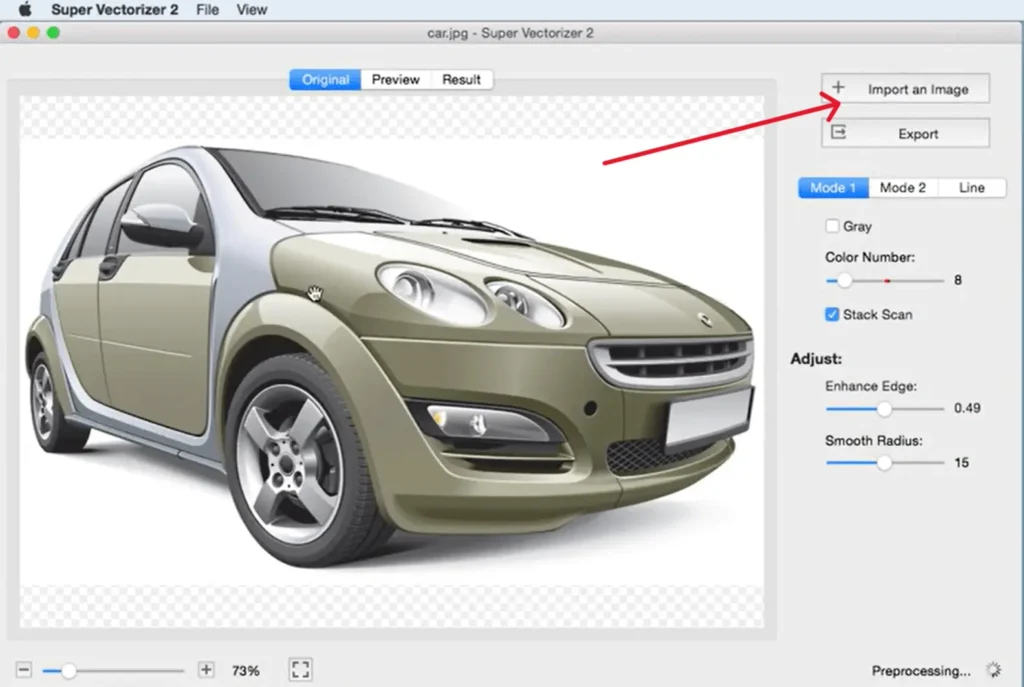
2. Mode 1 is selected by default; select “Stack scan” to overlap color regions.

3. After that, you can adjust the “Enhance Edge” and “Smooth Radius” Parameters to achieve the desired results.

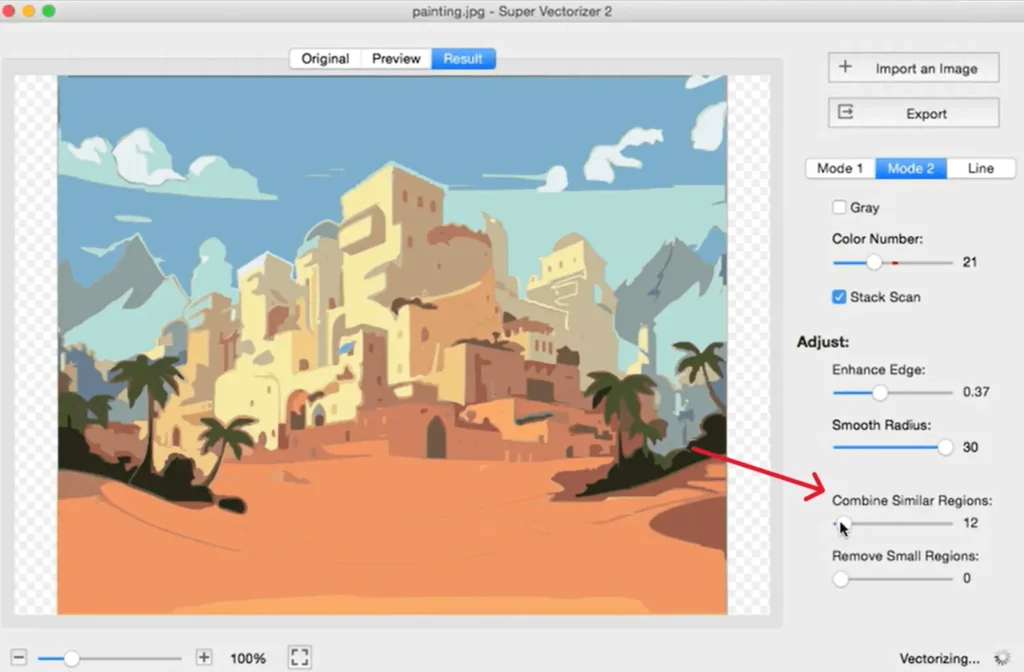
Mode 2
Mode 2 produces much cleaner and more concise vector graphics with smaller sizes. It offers more parameters than Mode 1.
1. Upload an image and select Mode 2
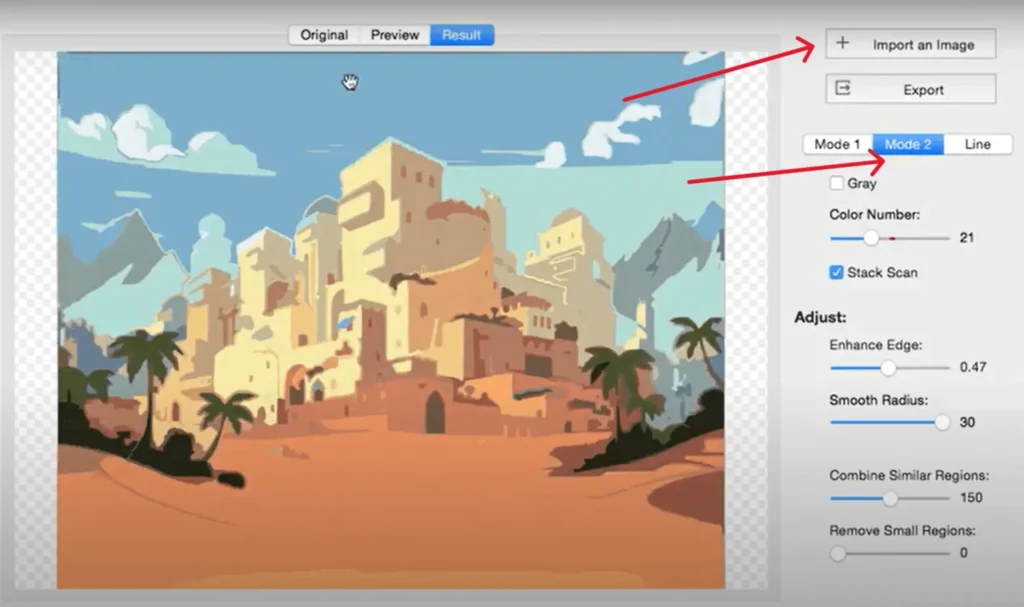
2. Start by adjusting the “Combine Similar Regions” parameter to combine regions with similar color.
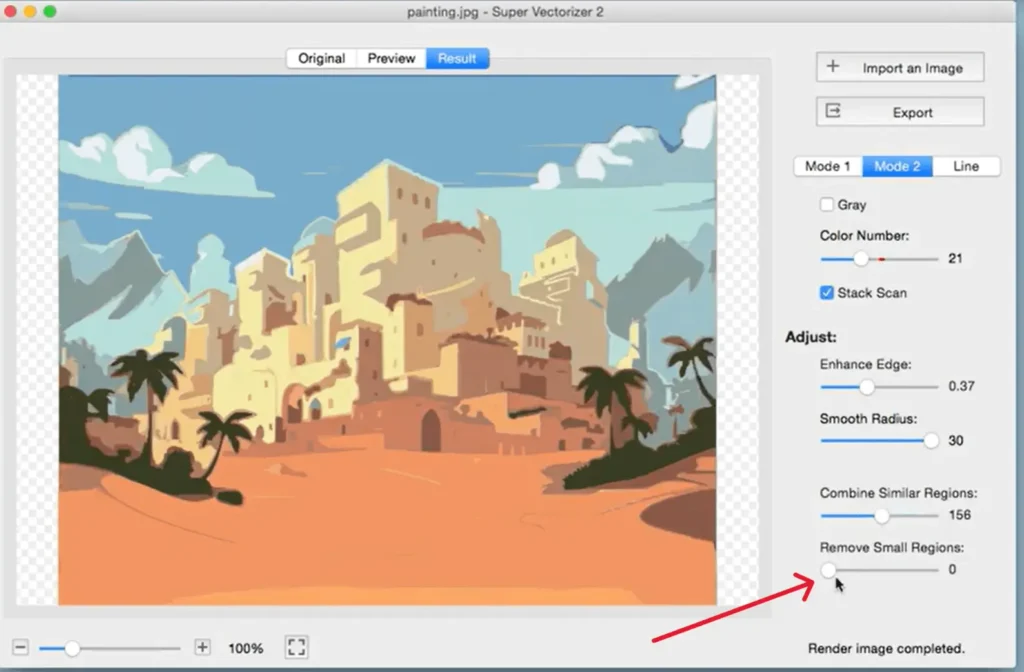
3. After that, adjust the “Remove Small Regions” parameter to remove small color regions to give your vector graphic a much cleaner look.
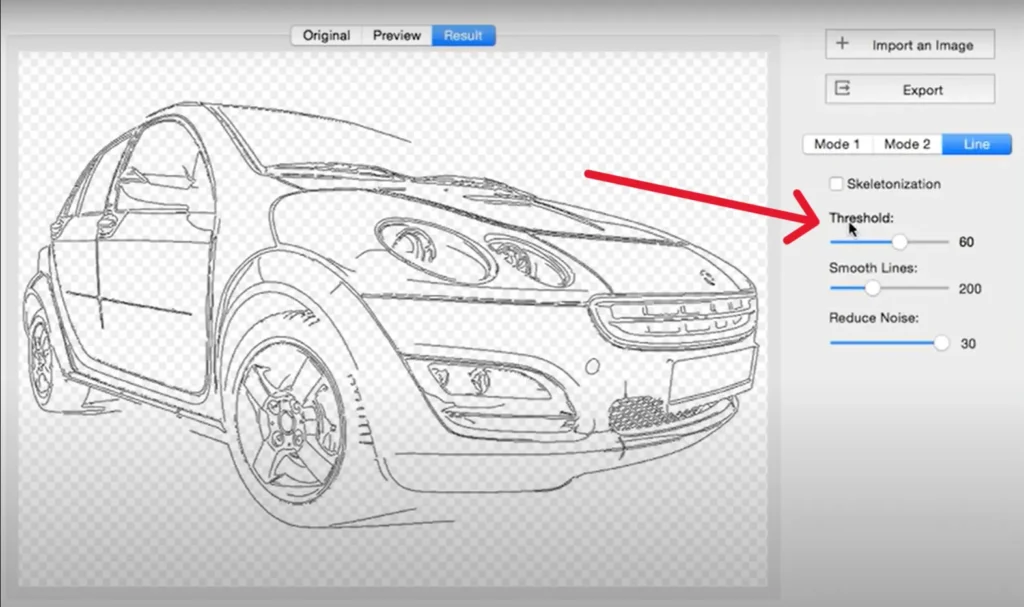
Line Mode
Line mode allows you to obtain the outlines of all the shapes in an image and adjust them according to your needs.
1. Upload an image and select Line Mode.
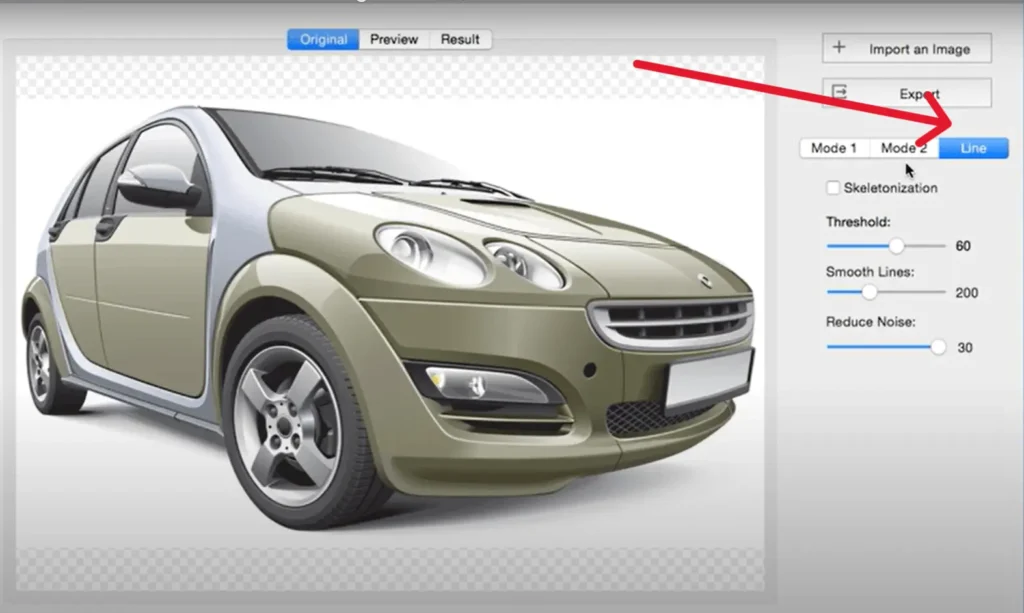
2. After selecting the Line mode, you will get the outlines of all the shapes in the image.
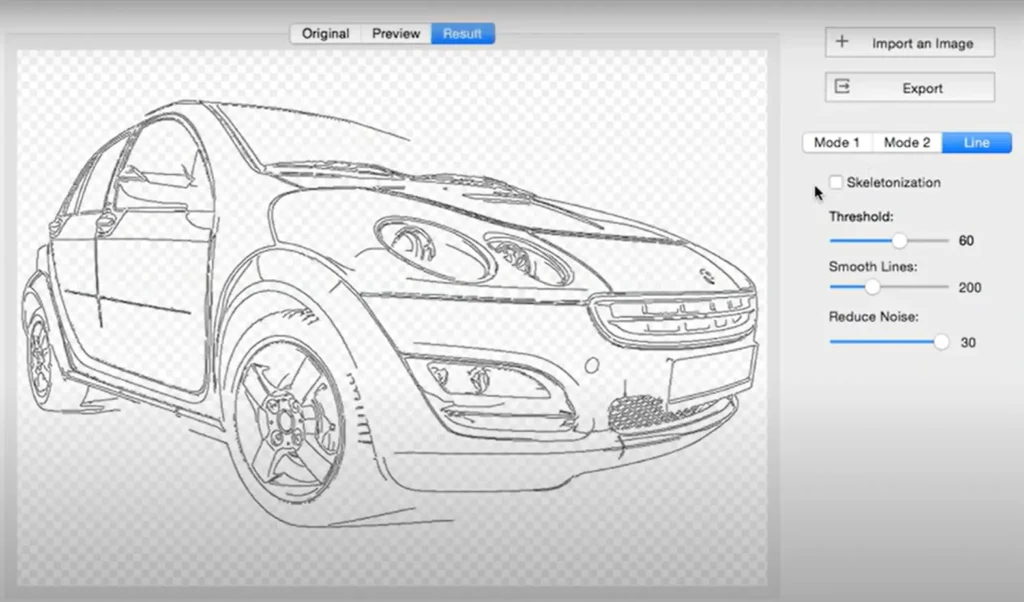
3. Adjust the “Threshold” parameter to control the number of lines in your image.
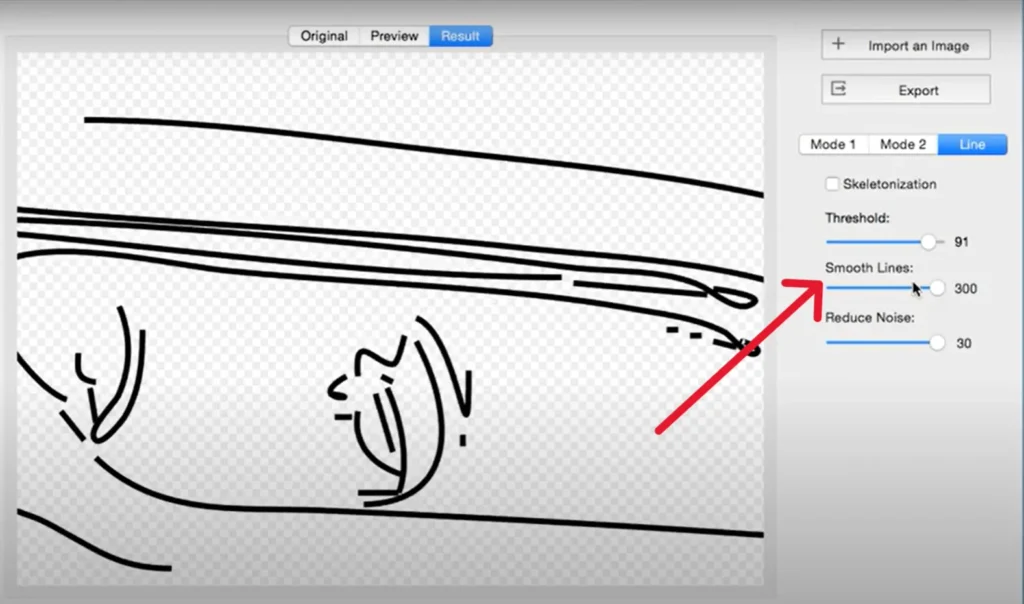
4. Adjust the parameter “Smooth lines” to smoothen the lines in the image for a cleaner result.
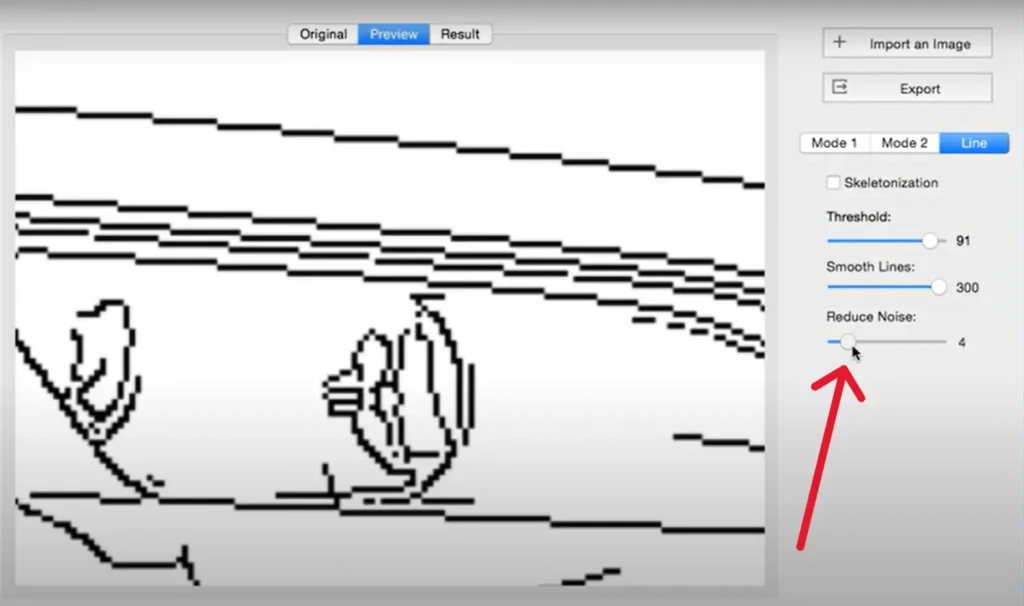
5. Adjust the “Reduce Noise” parameter to remove small pieces of lines from the final result.
Once you’ve created your vector graphic using the Super Vectorizer Pro, you can export your vectors into various formats, including AI, SVG, DXF, PDF, and more!
You can experiment with the different modes offered by this image vectorizer. Each mode might give you a different result; give each one a try to figure out which delivers the best results for your needs.
Conclusion
Ultimately, Super Vectorizer Pro benefits anyone who needs to create high-quality, scalable vector graphics easily. Whether you’re a professional designer, student, or simply someone who wants to enhance their images, this vectorization software for Mac can make your job easier.